It's frustrating to suddenly notice that framed art or a framed photo on your wall has been hung too high, too low, slightly crooked, or not centered.
What to do? Just live with it, or pull out the toolbox once again?
Whether it's a single custom frame or an entire gallery wall, our step-by-step guide on how to hang picture frames can help you avoid this headache from the start.

Before You Start
Check the front of your frame to make sure everything is mounted and positioned properly.
If your glaze has any dust or debris on it, wipe them away with a microfiber cloth. (For more maintenance tips, check our guide to taking care of picture frames).
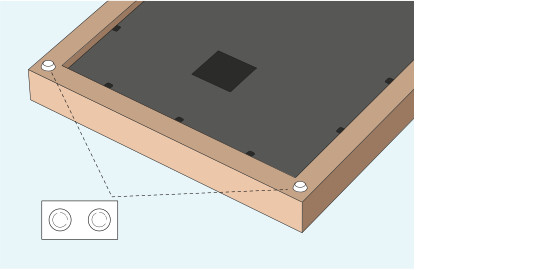
Next, find a couple of plastic or felt bumpers and stick them on the two bottom corners of your frame. This will protect the frame from scratching against your wall and vice versa.
Find the Right Spot
A good rule of thumb is placing the center of your artwork and photos around eye-level, especially when hanging a frame above a piece of furniture like a bed or couch.
You should also leave at least 6" between the top of any furniture and the bottom of the frame for breathing room.
Plan out your placement with a painter's tape outline or kraft paper cut to size to provide an idea of how everything will look when finished. It also helps to have a partner guide you as you hold the frame up against the wall.

Sawtooth Hangers
If your frame has a sawtooth on the back, use a pencil to lightly mark the spot on the wall where you'd like the top edge of the frame to be, and then make a second mark about one half-inch below the first

The sawtooth attaches to a single nail which you can tap in with a hammer at a very slight, downward angle, leaving a little of the nail head showing.
When you hang the frame, make sure the nail is catching the sawtooth grooves and not any part of the frame itself.

Wire Hanging
Most larger frames should come with a wire-hanging system across the back.
If you are framing at home with one of our DIY custom framing kits, one of the final steps is securing this wire to the frame using the included screws and screwdriver. Locate the two pre-drilled holes closer to the top side of the frame, and attach the wire to both sides with the screws until it is taut across the frame.
Make your mark on the wall where the center of the frame's top edge will be, but this time, make your second mark a distance below the first equal to the distance between the top of your frame and the wire when pulled tight.

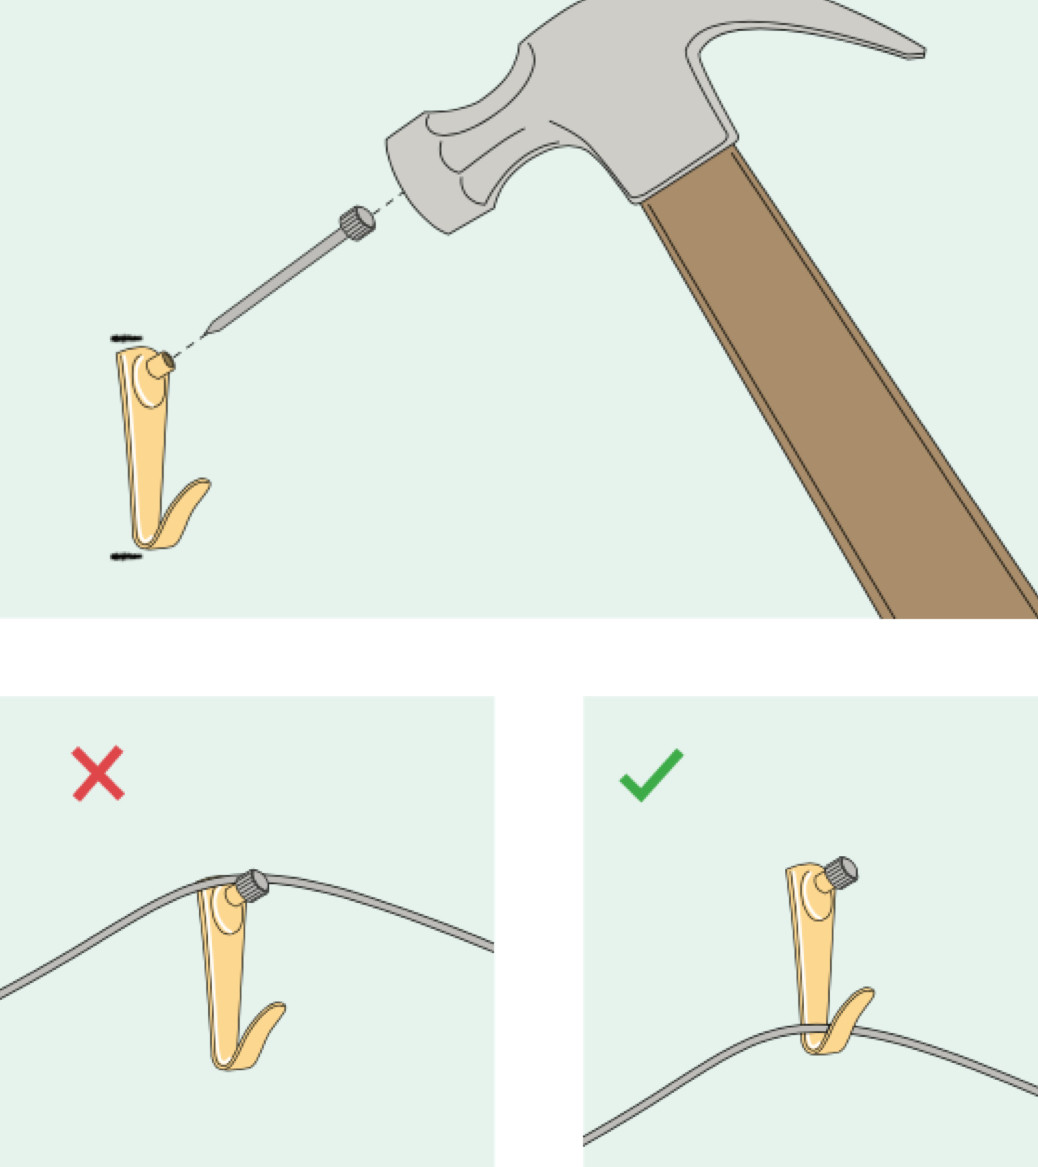
Using a hammer and a picture framing hook with nail, tap in the hook so that its bottom lip is level with your lower pencil mark.
For really large frames (above 30" x 40" or so), you can install two hooks side by side, 8" to 10" apart.
Hang the frame by placing the wire into the cradle of the hook, making sure that it's not resting on the nail head.
Level your frame and you are done! Now you'll never have to live with accidental nail holes again.
For more on this topic, see our advanced tips and tricks for hanging pictures frames that includes popular gallery wall layouts and how to mix different frame styles and sizes.
WallBuddies
Some frames use the WallBuddies system, brackets on the top corners that are self-leveling and keep your frame nicely flush with the wall.
The following video demonstrates how to easily hang a frame with WallBuddies using our special template to get the placement as precise as possible.
Have a custom project or need framing advice? We are here to help!
Customize a frame for any artwork, print or poster, or we can help you print and frame your digital photos.
All Level frames are handcrafted using only the highest quality materials. See what other's have to say in our customer reviews.

Photo credit: @justincblomgren
Happy framing!


